How to Clean Beeswax
Bubba’s Beez (my son James aka Bubba) is supplying me (his good ol’ mom) with raw beeswax for making lip balm, hand salves, etc. The problem is, no one wants to buy lip balm with a bee leg in it (or any of the other various bee parts I’ve found over the past week). At least I wouldn’t want to so that makes me assume that others wouldn’t want to either.
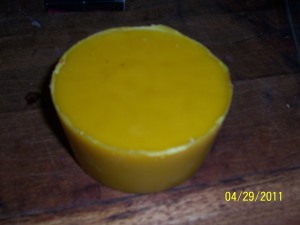
So, how do you go from this:
to this:
Before I explain the steps involved, here are a few key tips to remember:
-
Use a pot or utensils that you don’t need any longer. Beeswax is very difficult to remove and it’s just easier to part with a pot you no longer want or need than to use one of your good ones.
- Do not leave the beeswax unattended. It can easily catch on fire (as any wax can).
- Melt the wax on a lower setting, not high.
- Be patient with this process, it takes awhile.
Okay, now that I’ve said those things, let’s move on to cleaning the wax.
UPDATE 3/1/2013: If the beeswax you have is black, do not use this wax. It is really old wax and will not render anything useful. I tried and it does not work. Try to use wax that is very pale yellow to a medium brown. This gives really beautiful clean wax when finished properly. Trust me. Do not use the old black wax. It will crumble and disintegrate into complete nastiness. Just thought I’d give you a heads up! Happy beeswax cleaning! One further update – we are now selling Bubba’s Beez non-petroleum jelly and lip balm in various flavors – all completely natural. Email me if you’re interested in purchasing any. You can find us on etsy under Bubba’s Beez. Thanks!


that’s pretty cool! Will this be aiding to your son’s business? You should totally sell this! I love bee’s wax candles myself.
Thank you so much. I’m an urban beek in LA and I do crush-n-strain to get my honey – and I had some NASTY wax. I wanted to use it to coat some new frames, but -eeeewww. I tried melting some without the water and just got cooked bug parts with a wax glaze. So gross. Using the water, the wax came right to the top!
P.S. I used a mason jar in the microwave. Worked like a charm!
That would truly be horrendous – waxy bugs…nasty! Thanks for the comment. How has your honey season been? We were in a severe drought last year and have had more rain in 2012 than we did most of last year. I’m really hoping that we’ll have a better honey flow. Take care and keep up the good work with the wax!
Love your post! I cleaned wax for the first time yesterday after reading this, thank you for the tips and advice!!!!
The stockings you are referring to – are they ladies hose, or a cotton sock?
These are ladies’ hose. You could even use cheesecloth if you have it. You just need something with a tight weave that will keep the bee particles and gunk from straining through to the clean wax.
Thanks for the comment! Let me know how it goes!
Here in Florida, for some reason beeswax is ridiculously expensive to buy locally. One beekeeper told me he can’t keep it in stock! I already bought a huge slab from him and I’m wondering if I should lean it, then sell it. Have you ever tried selling it for extra money?
I love your post, best of luck!
Thanks for the comment! I do sell it. We sell my son’s honey at local market days and we’ve just added 1 oz. beeswax hearts. They don’t really sell at the market days, but they are available. We’re working with a few local soap/lip balm makers to cross market and sell to them, but that’s all in the works right now. You can find our hearts and lip balms, etc. for sale at our etsy store: http://www.etsy.com/shop/BubbasBeez?ref=search_shop_redirect
Hi there, thank you for the information, I am about to try this for the first time. I will let you know how it all turns out. from Australia.
We just started beekeeping last summer, and use the crush and strain method. Glad I saved all that nasty looking wax, and have finally found a simple, effective way to make it useful!! Thanks so much for your information!!
You’re very welcome, Kelly! Let me know how it turns out.
Trying this today for the first time…so far, so good! The pot is cooling on the stove even as I type.
Hi! Old dark comb still has lovely useable wax in it. I use a homemade solar melter (glass window covering a styrofoam cooler) and process lots of old, yucky comb into beautiful wax. Four thicknesses of cheesecloth over a plastic storage container half filled with water. (I tie the cheesecloth to the container with string – rubberbands deteriorate quickly in heat!) The junk that’s left in the cheescloth goes in the compost.
Thank you for sharing this. One of these days I’m going to make a solar melter. Care to share how you made yours?
Hey,
I just melted beeswax for the first time and what I did was I used glassware, which is much easier to clean than stainless steel. Also because the comb I used still had some honey in it, I just put the whole thing into the microwave (50s under 800W). Honey heats up very quickly and starts melting the wax while also separating the dirt (note – wax by itself will not melt in the microwave). I removed the dirt with the spoon and poured wax into little yellow plastic containers from Kinder Surprise eggs. Then I put them all into the freezer for 10 minutes and voila! Got my wife nicely packed and “measured” cans of beeswax which is also easy to remove from containers.
The only thing I was not sure about was the effect of microwaves on the beeswax – I hope it did not spoil because of that.
I bought 8 lbs of beeswax from the himalayan hills… and it is almost black-ish, if not very dark brown… I’m still trying to clean it because that is all I have. I live in India and do not know good sources. Your post has been a great help! Many thanks!!
I’ve never had a problem with cleaning beeswax. I don’t think it needs to be anymore complicated than melting and straining it. Of course, buying beeswax is a lot simpler than cleaning it! Wishing you all the best in your beeswax endeavors!